Meet Cute.
You and Animatics in Previs Pro.
Overview
Animatics are the bridge between storyboards and a finished film. They let you test pacing, timing, and flow long before production begins. In Previs Pro, that planning tool becomes a creative playground: characters move, props fly, cameras shift, and the story doesn’t just sit on the page, it plays out. Mix stills with motion, refine timing, and share the whole sequence as a video so your team sees the story exactly as you imagine it.
Previs Pro is a full pre-visualization package. But enough talk, let's show...
“Meet Cute”
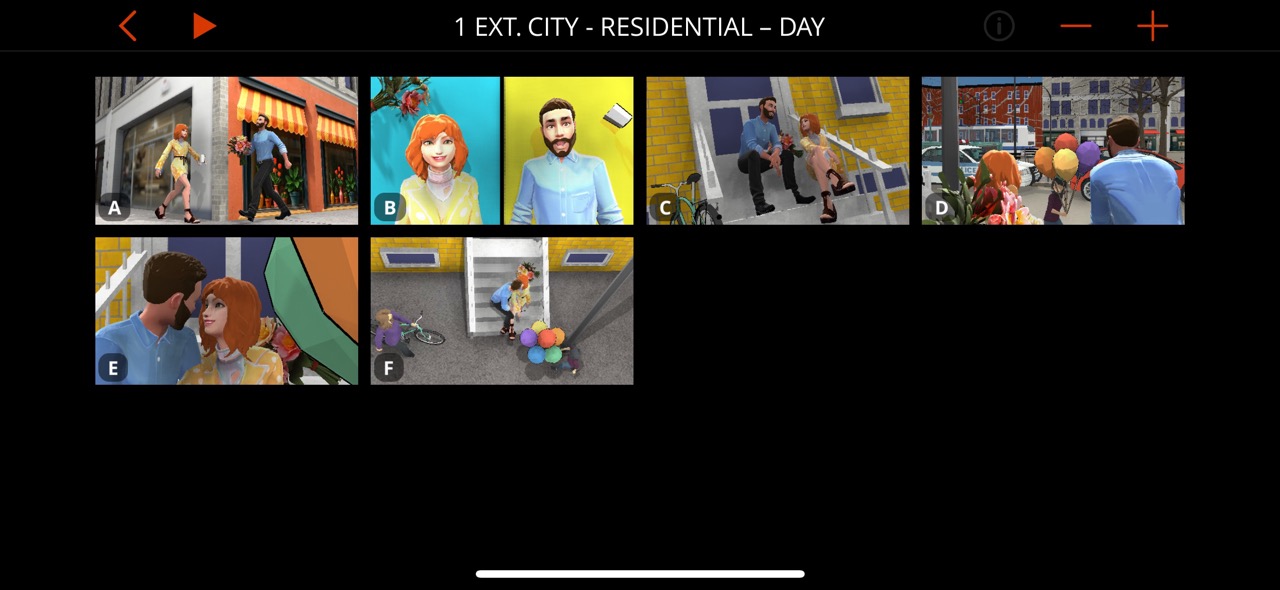
Let’s build a simple animatic together: two people bumping into each other as they turn the corner of a building. A bouquet of flowers goes flying, setting up a playful “meet cute” moment that cuts to a mock “interview” shot.
Step 1: Storyboard the Scene
Start by creating your storyboard the way you normally would. This makes sure you’ve captured the key shots, chosen your camera angles, and set your lighting to a good place before adding animation.
Step 2: Open the Animation Canvas
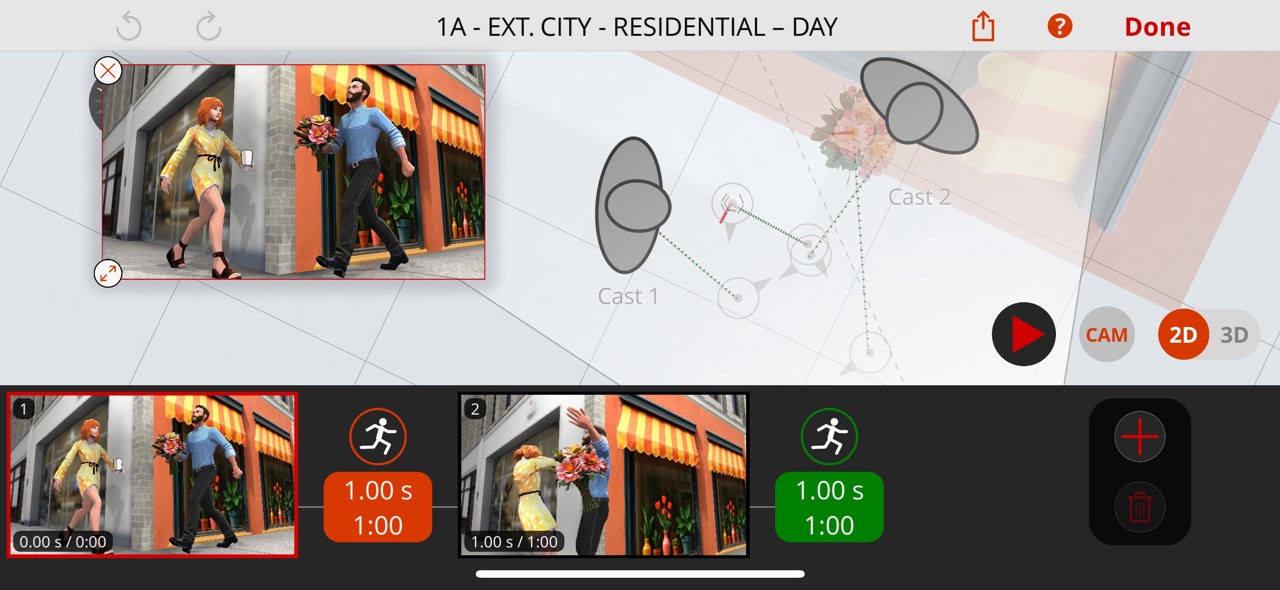
Now let’s add animation to the first shot—our characters colliding and the flowers flying toward the camera. Open the Animation canvas. Tap the small running man icon highlighted in the red circle below.
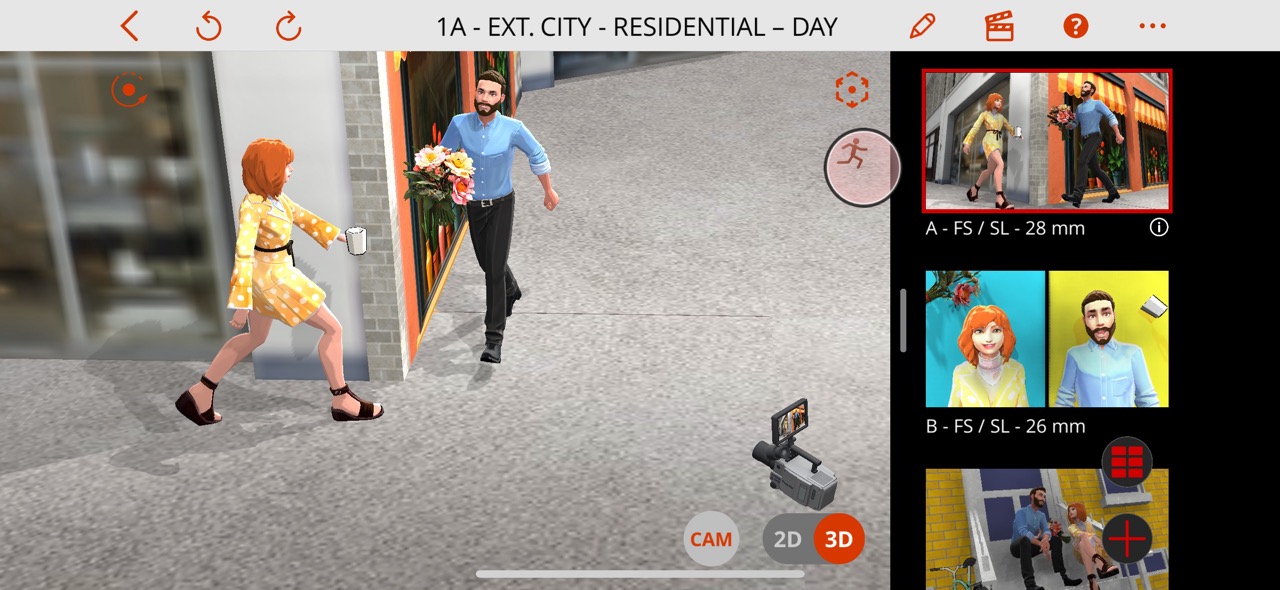
This is the Animation Canvas. We’re showing it on an iPhone here, but you’ll find it easier to work on an iPad or Mac. Still, the fact that you can animate on your phone is pretty amazing.

The screen shows:
- Timeline (Film Strip) at the bottom: instead of vertical stacks (like in storyboarding), shots stretch out horizontally. You see two keyframes in the image above.
- Keyframes: these are the shots that define the arc of your animation.
- Time boxes: tap between keyframes to adjust how long that section lasts.
- + Button: add a new keyframe to extend your animation. Just like adding a shot to your storyboard.
- Play Button: preview your animation.
Previs Pro automatically interpolates the motion between keyframes for the time you’ve set. To get finer control of your motion add more keyframes. It's really that simple.
Like the Canvas, you can view your animation in 2D, 3D, or through the Camera (CAM). You can select objects, move or rotate them, and adjust options like Pose, Expression, Lighting Intensity, and Lighting Color.
Step 3: Animate the Collision
Now let’s move the two characters so they collide.
Tap on the second Keyframe and adjust the character's poses to show the moment of impact. Move the flowers and coffee to show them flying into the air.
Now let's add another keyframe and have the flowers shoot toward the camera, obscuring the scene and also to be used for an artistic transition to the next shot.
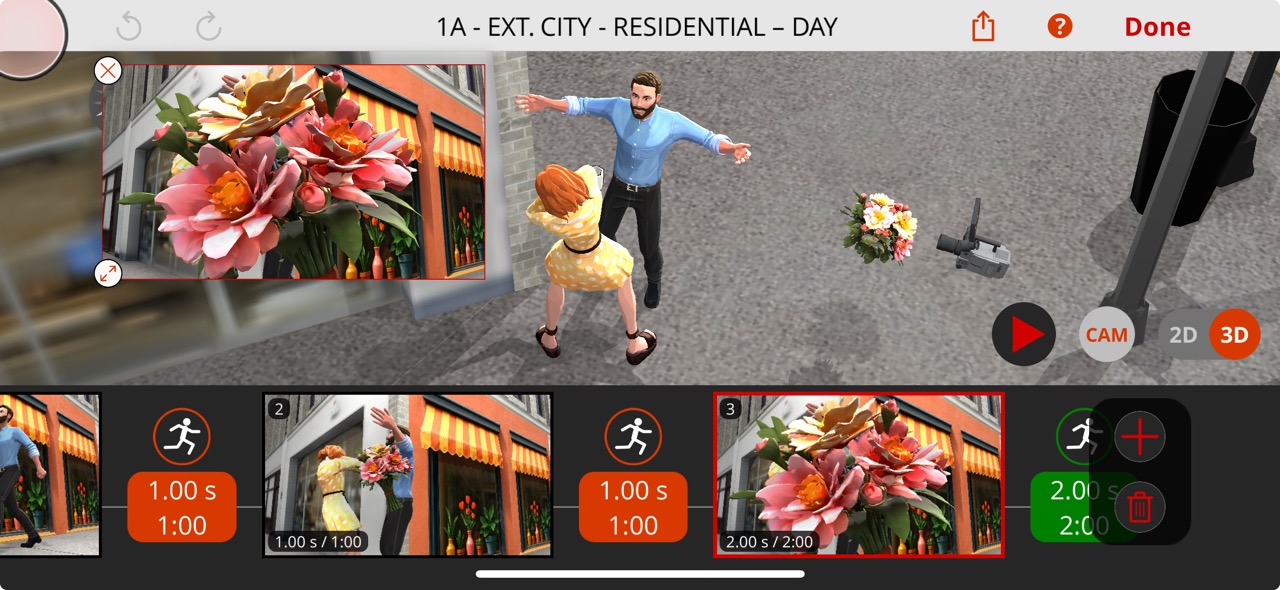
Hit Play to see your work in action.
Step 4: Refine with Split and Paths
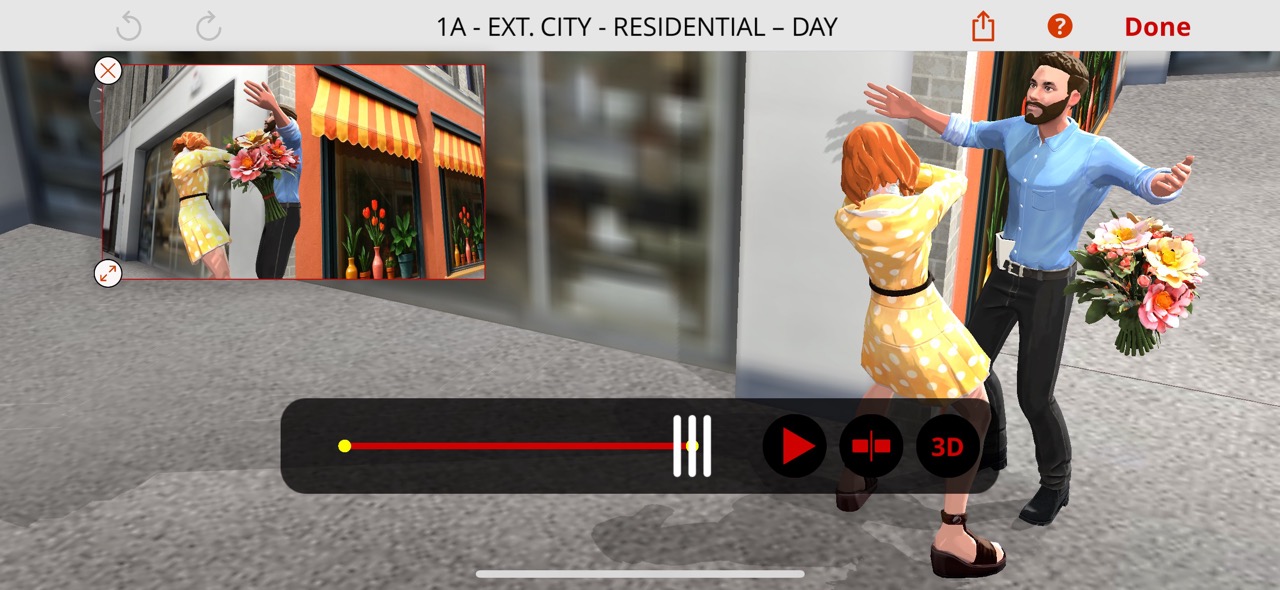
When you play the animation, you’ll see a couple of useful tools:
- Split Button: scrub to a point in the timeline and press Split. This adds a new keyframe there and balances the timing on both sides. It’s perfect for making changes without throwing your whole sequence off. For example if you wanted one of the actors to change their expression or pose at a specific time.
- 2D to View Paths: in 2D mode, you’ll see the motion paths of objects over time. This is very useful for adjusting and cleaning up multi-keyframe movement sequences, making sure each time period reflects a good amount of movement.
- Tap any point on the path to jump to that keyframe.
- From there, you can move or rotate the object.
- Previs Pro automatically smooths the motion into natural curves.
- Tap any point on the path to jump to that keyframe.
Step 5: Mix, Match, and Export
Back at the top level of your project, you can mix animated shots with still storyboards. Play them together in the Player, or export your full animatic as an MP4 video using the Export Menu.
Wrap-Up
That’s it—you’ve built your first animatic in Previs Pro! The process is simple but powerful: sketch your storyboards, add keyframes, refine the timing, and export your vision as a shareable video. With this feature, you can bring your story into focus for your collaborators, investors, crew, and yourself.
Here are some other quick 6 panel storyboards we've turned into animatics:
