How to add and use the camera
To establish your shot, touch and hold the camera and move around your set. Zoom in or out with a pinch.
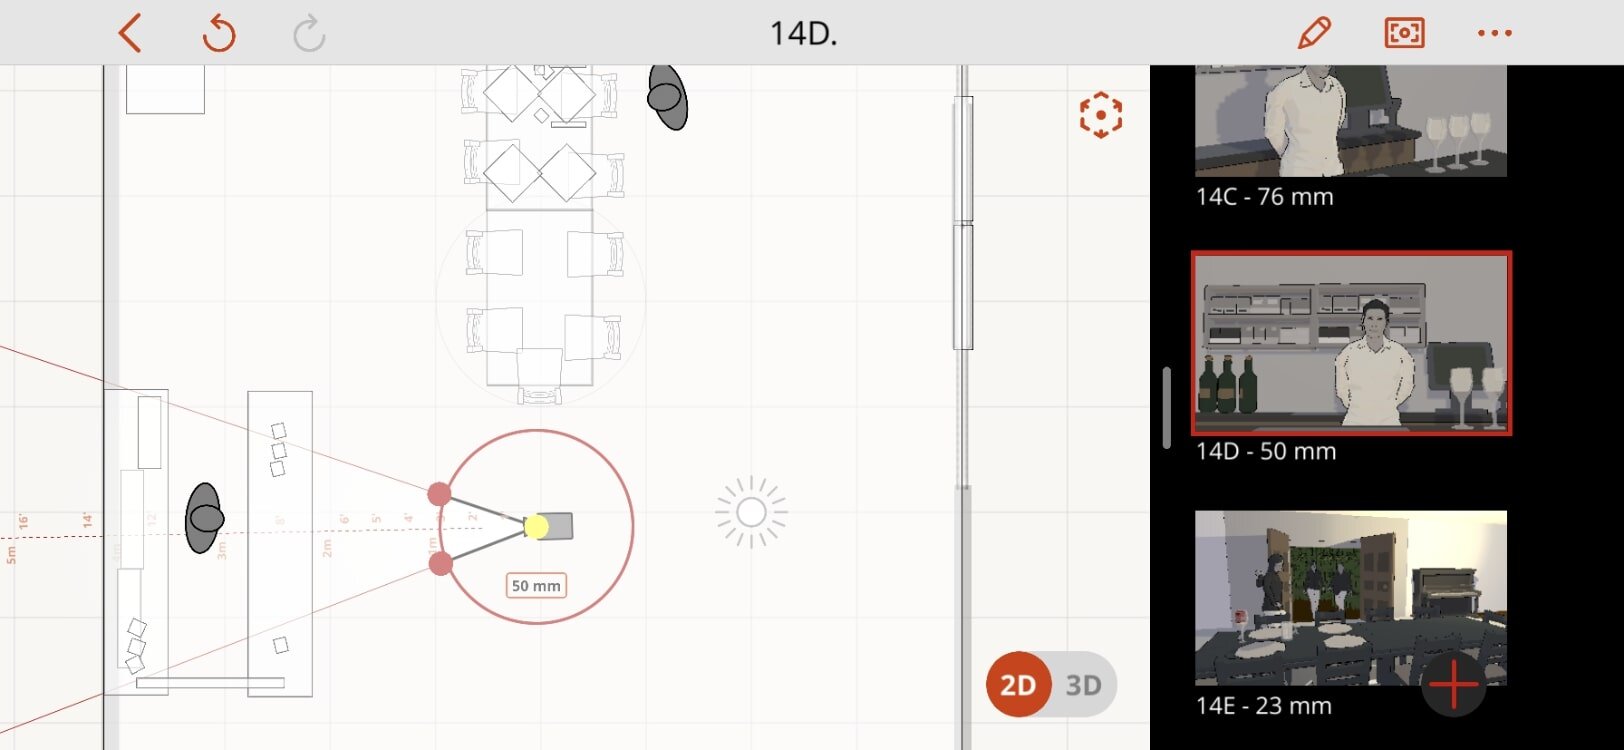
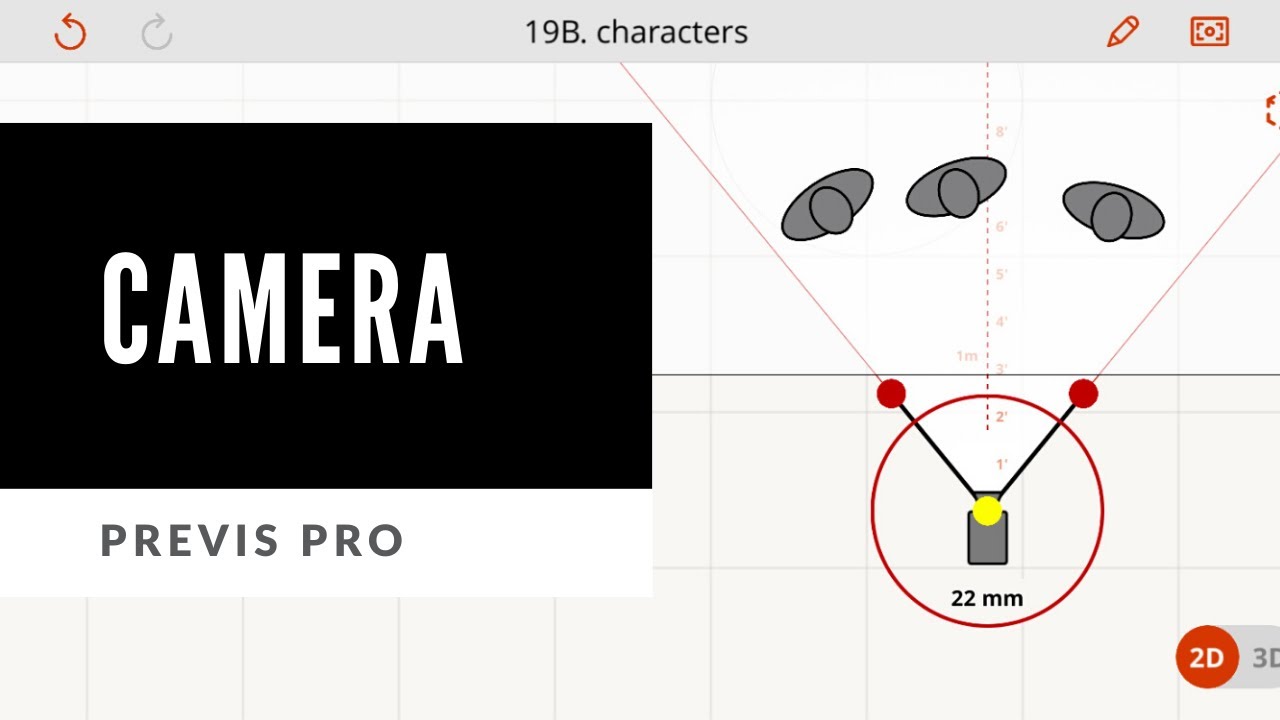
Working in the 2D canvas
Turning the outer circle will rotate the camera. Tapping the center dot will let you move the camera left/right front/back. Tapping one of the two outer dots will let you adjust the focal length.
As you adjust the focal length, haptic touch will help you find your prime lenses. Use the ruler to see how far to position your camera from your subject.
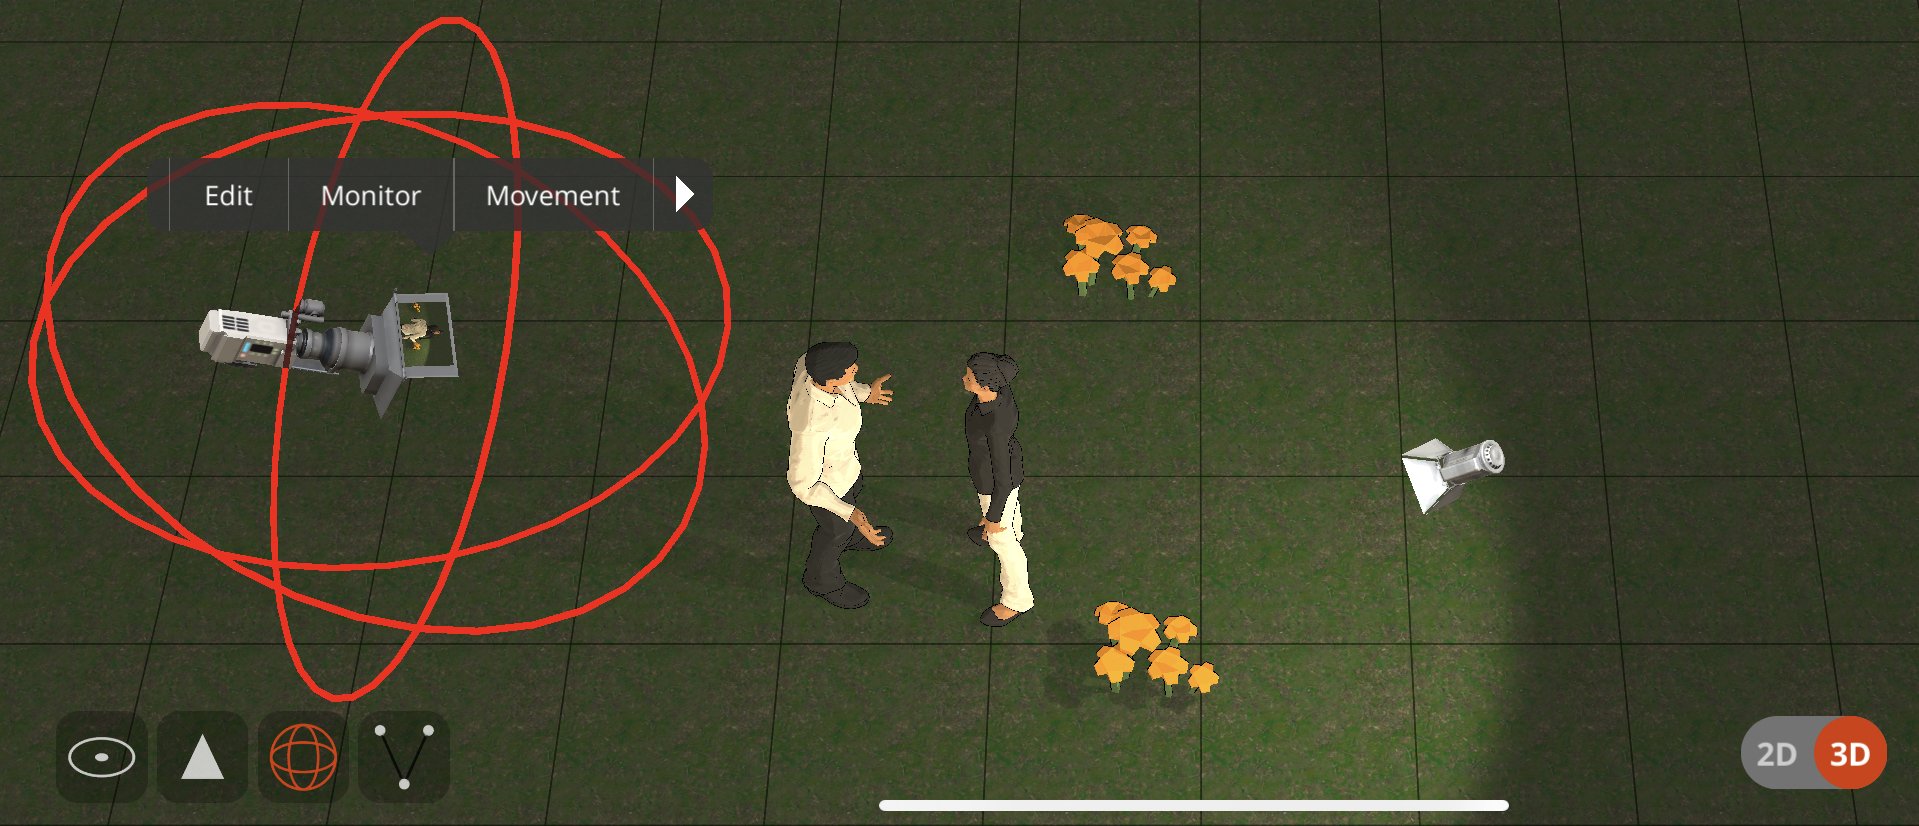
Working in the 3D canvas
Using the camera in the 3D Canvas works identically to 2D Canvas, except in the lower left of the screen you’ll see some different modes that change how your touch manipulates the camera. The Triangle will let you change the elevation of the camera, the globe lines will let you rotate the camera anywhere in three dimensions.
Multi-Camera Support
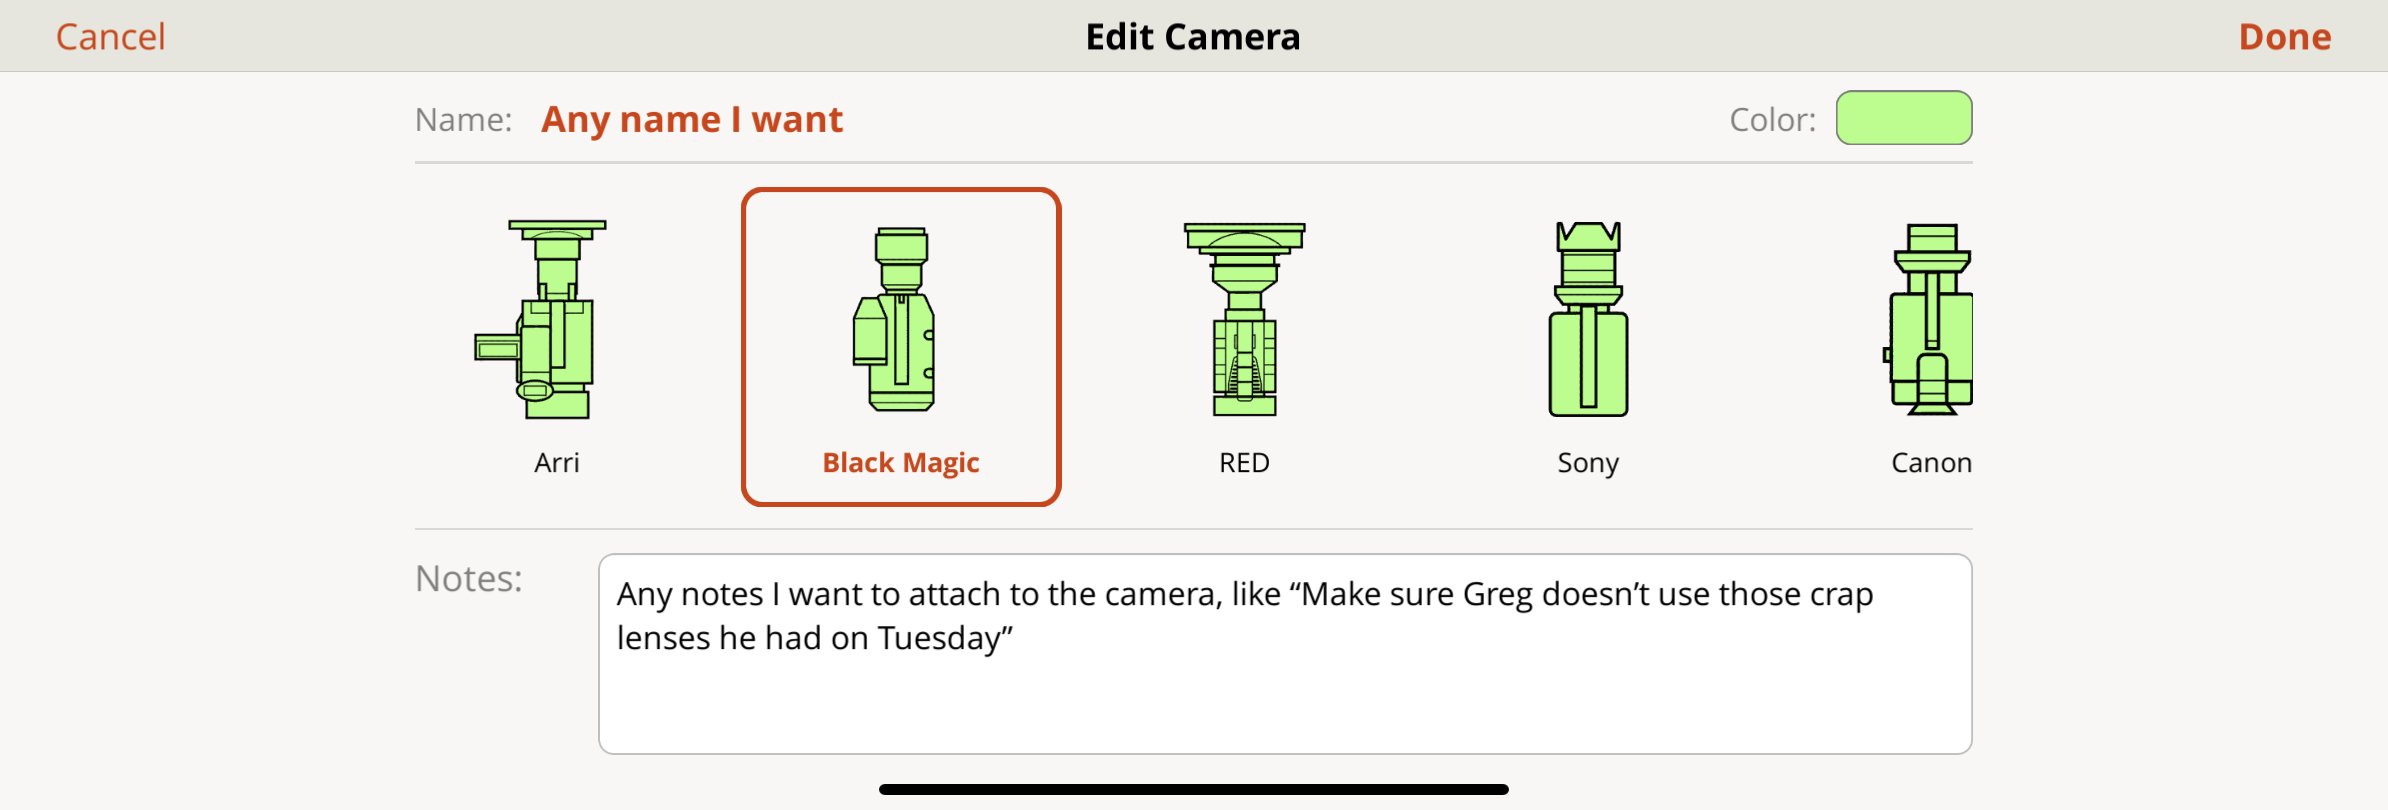
You can add a second camera either from the Add Object (Pencil) screen, or by selecting the camera and selecting Duplicate from the horizontal menu. Only one camera can be Active per shot. If you Edit the camera from it’s horizontal menu, you can pick a 2D Icon to represent the camera you’re using, as well as detail specific name, notes, and color to help your Storyboards or other exports be as clear as possible.
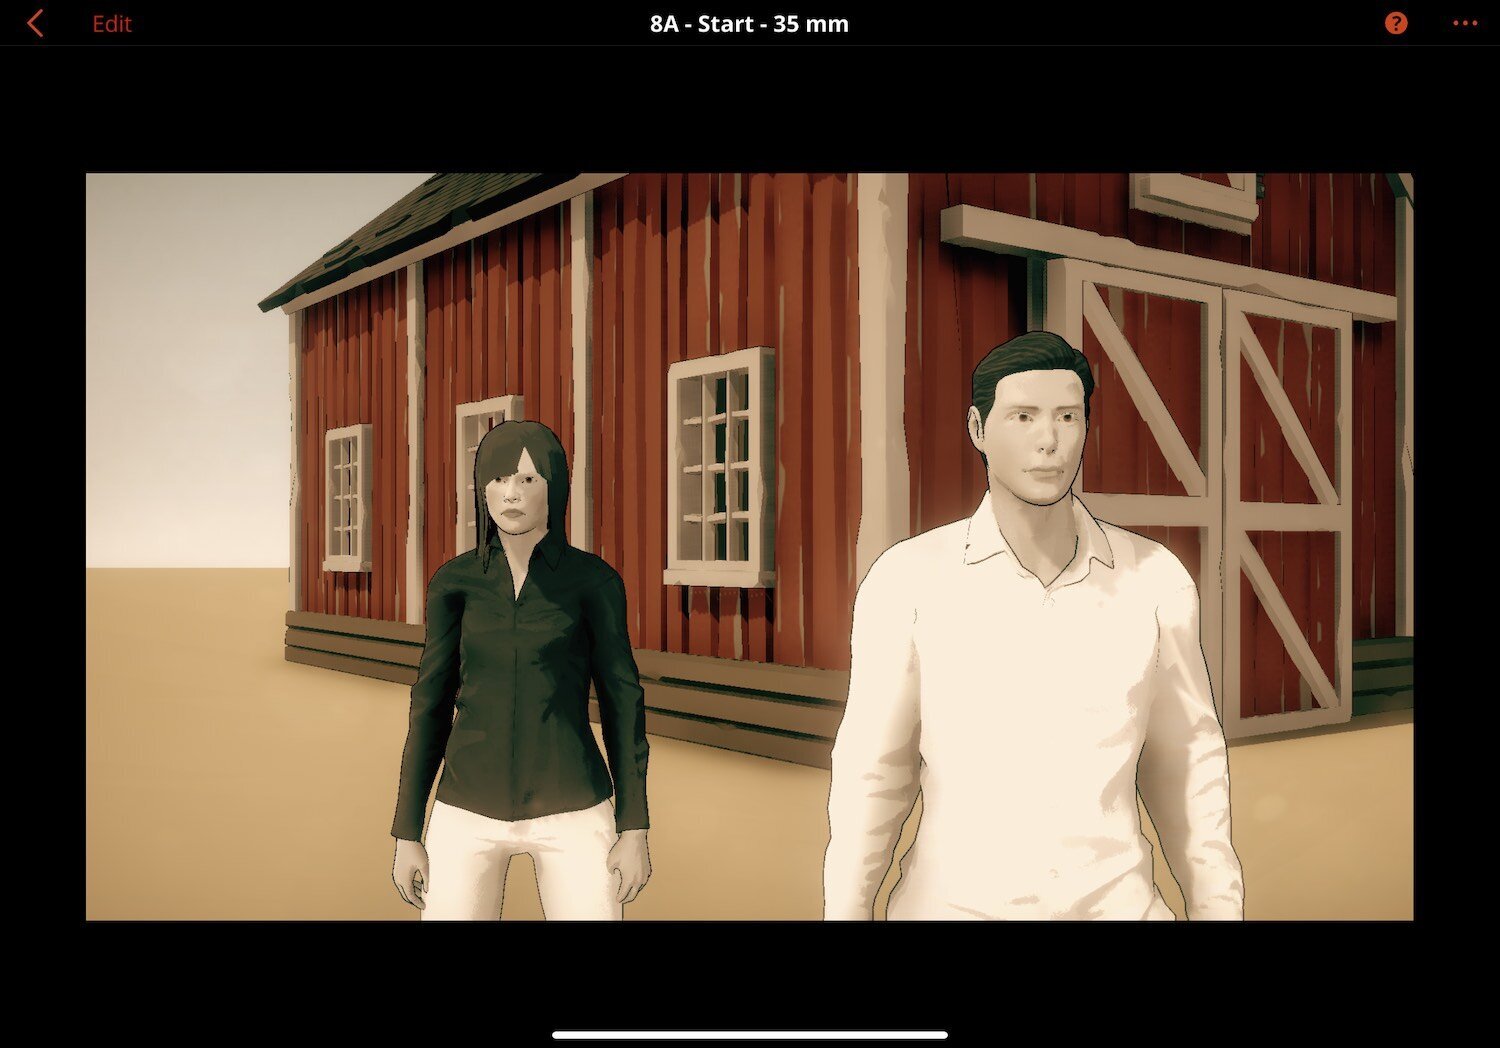
Directors view
In 2D or 3D view, press the Director’s View icon to the right of the Pencil icon.
Now you see the shot exactly as you’ll see it through your camera. You can use the arrows on either side to step through your Scene. If there are shot notes, the note icon in the lower right will show/hide them. Hit the “Edit” button to enter Monitor Mode.
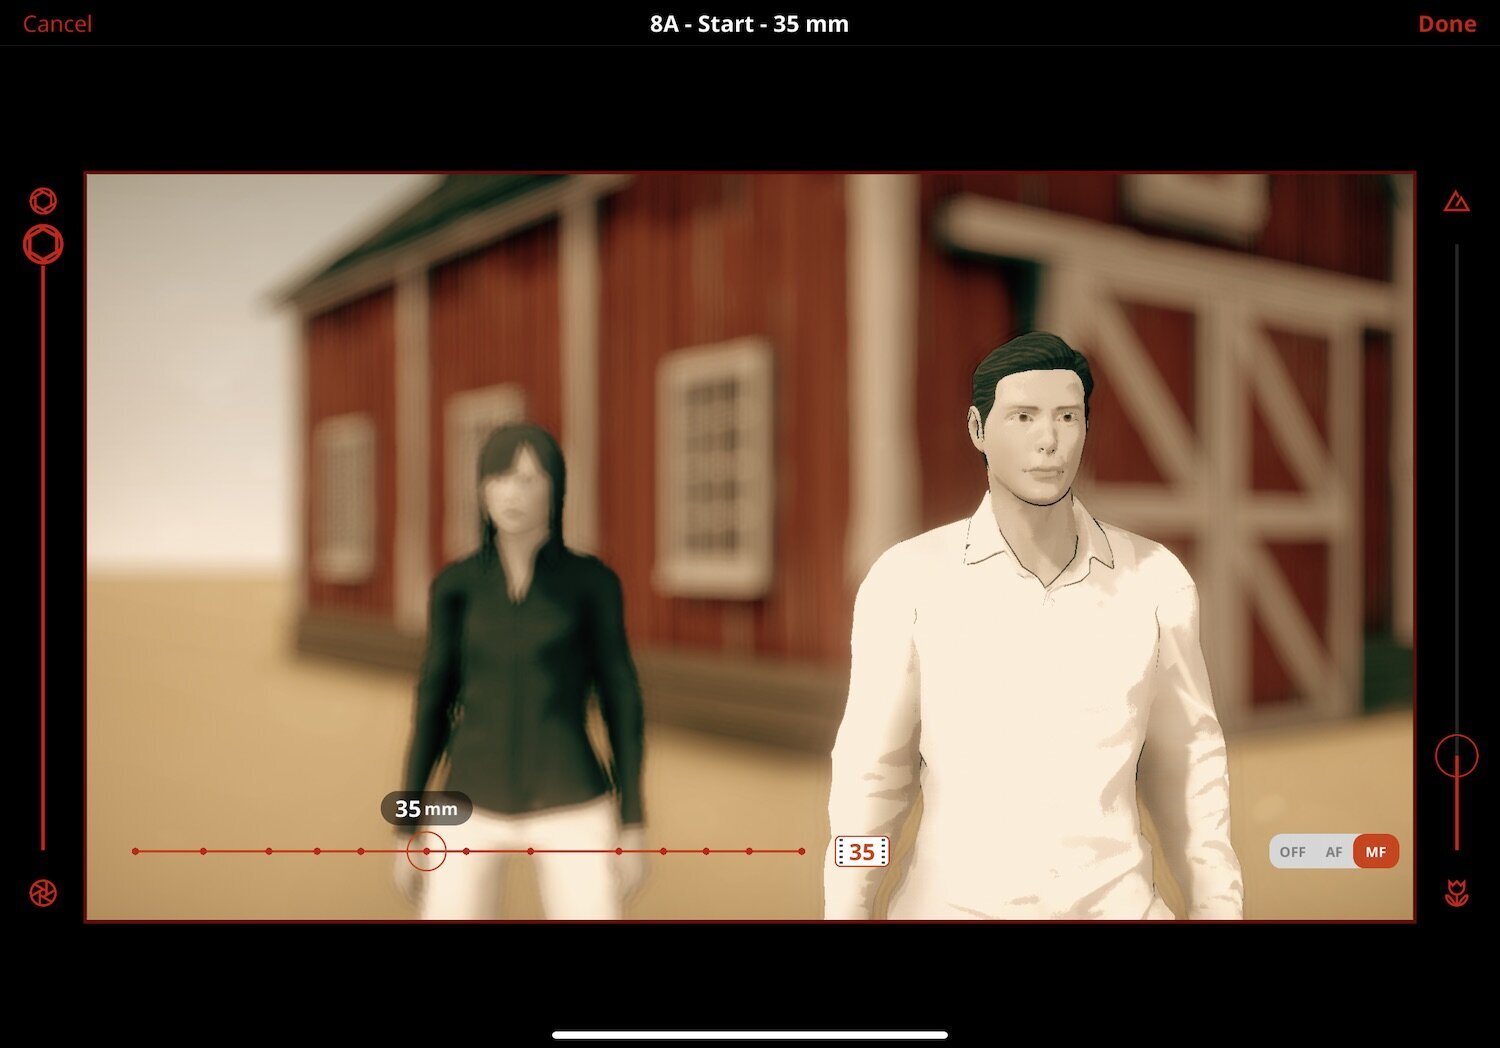
Monitor Mode
From Director’s view, tap the EDIT button, or from 2D or 3D mode the horizontal menu on the Camera itself. A double tap on the Camera is another shortcut to jump directly to Monitor Mode.
Use one finger and drag the screen to adjust the camera angle. Two fingers drag will move the camera L/W + Up/Down, two finger pinch will move the camera in and out. Two spread finger rotation will rotate the camera in place.
Use the control along the bottom left to adjust the Lens. It will ‘snap to’ Prime Lens sizes and highlight them.
Use the OFF | AF | MF along the bottom right to engage and control Auto and Manual Focus for each specific shot.
There are Grid lines you can enable from the top of the screen to help you frame your images perfectly.
Changes you make in Director’s View are only saved when you hit DONE in the upper right.